
How to configure a SmartRG SR505n
Firmware Upgrade
How to Upgrade the firmware
Before performing any troubleshooting of settings on the SR505/SR360 make sure that they have up to date firmware and installed configuration script.
- Check the firmware on the “Device Info” page.

If this is out of date then
- Browse to: http://www.lmi.net/support/firmware or your ISP
- Download the appropriate firmware
- [Optional] Download the appropriate config script from your ISP
- Even if you’re going to be configuring the modem as a bridge, get the PPPoE file as well.
- Go back to the modem web interface
- Click on Management > Update Software
- Choose the firmware file downloaded earlier
- Click Update software
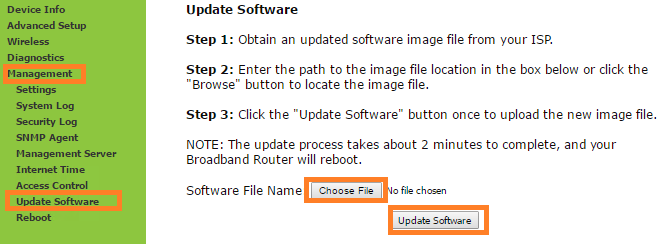
- Wait for the modem to finish updating and has rebooting
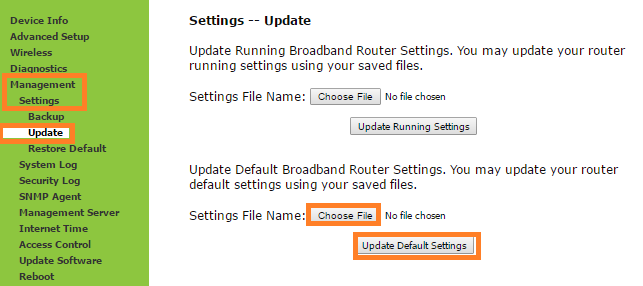
After the firmware update it’s recommended to use your ISP’s provided configuration if available.
- Visit Management -> Settings -> Update Settings
- Update the Default Settings with the PPPoE Script
ADSL PPPoE
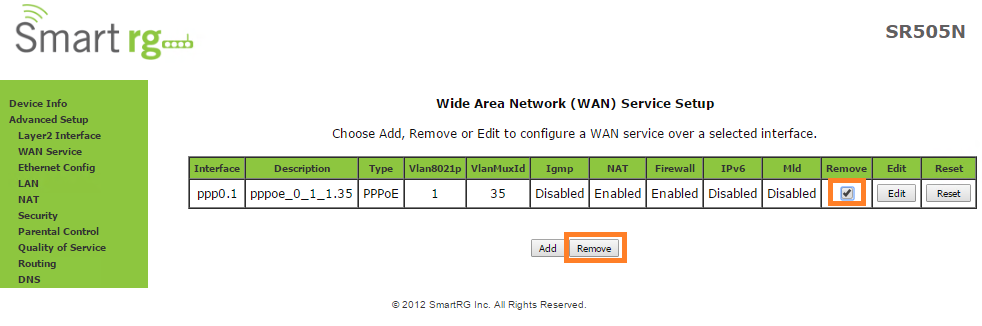
How to remove and rebuild an ADSL PPPoE Connection
This should only be done if editing the existing connection doesn’t work
- Go to Advanced Setup -> WAN Service
- Remove all WAN Services

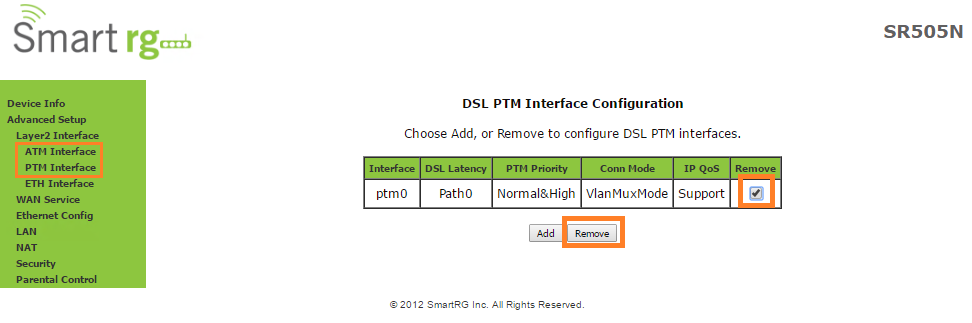
- Go to Layer 2 Interface
- Remove all ATM interfaces
- Remove all PTM interfaces

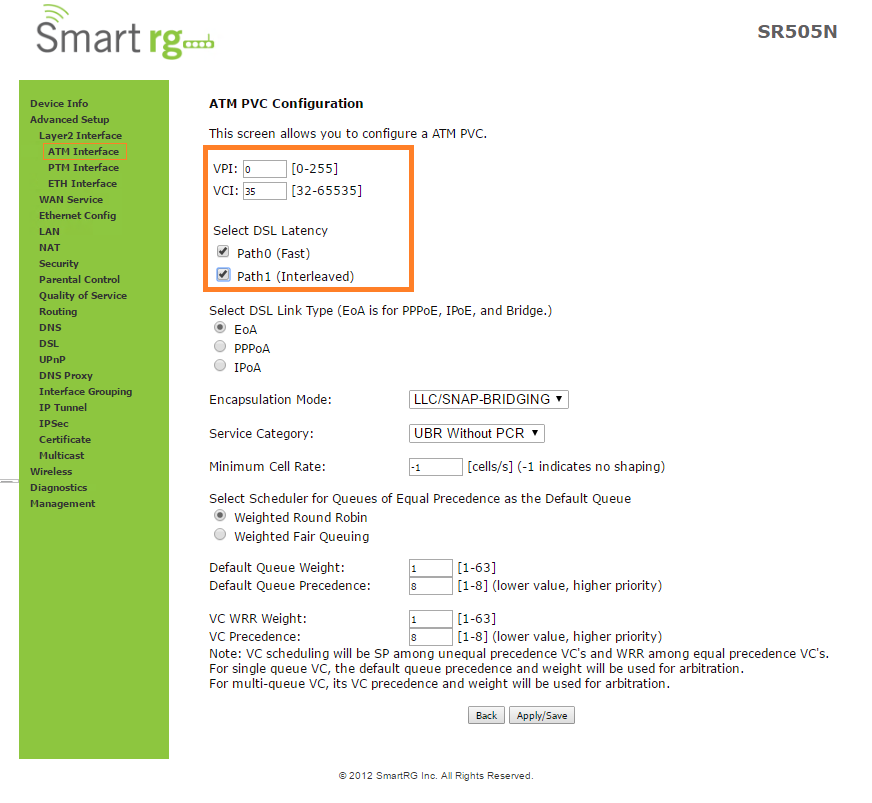
- Add a new ATM interface
- VPI: 0
- VCI: 35
- Check Path0 and Path1
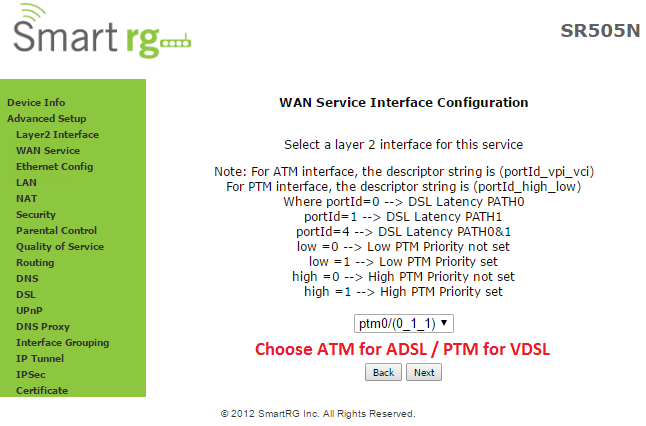
- Go to WAN Service
- Add new WAN Service
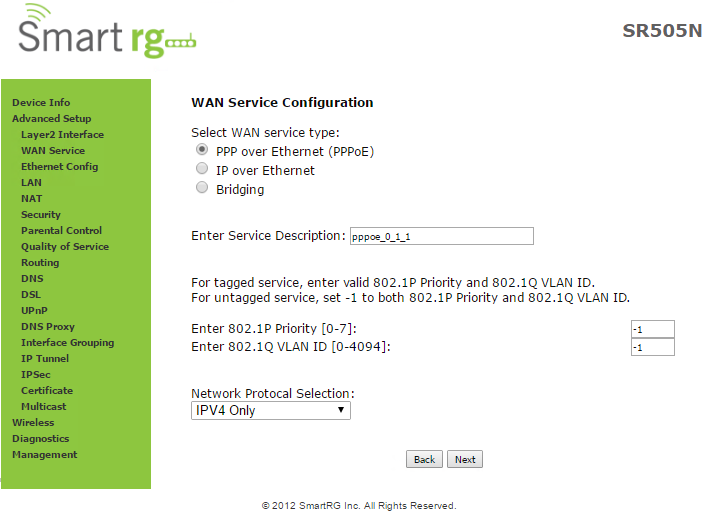
- Type: PPP over Ethernet
- Everything else, default.

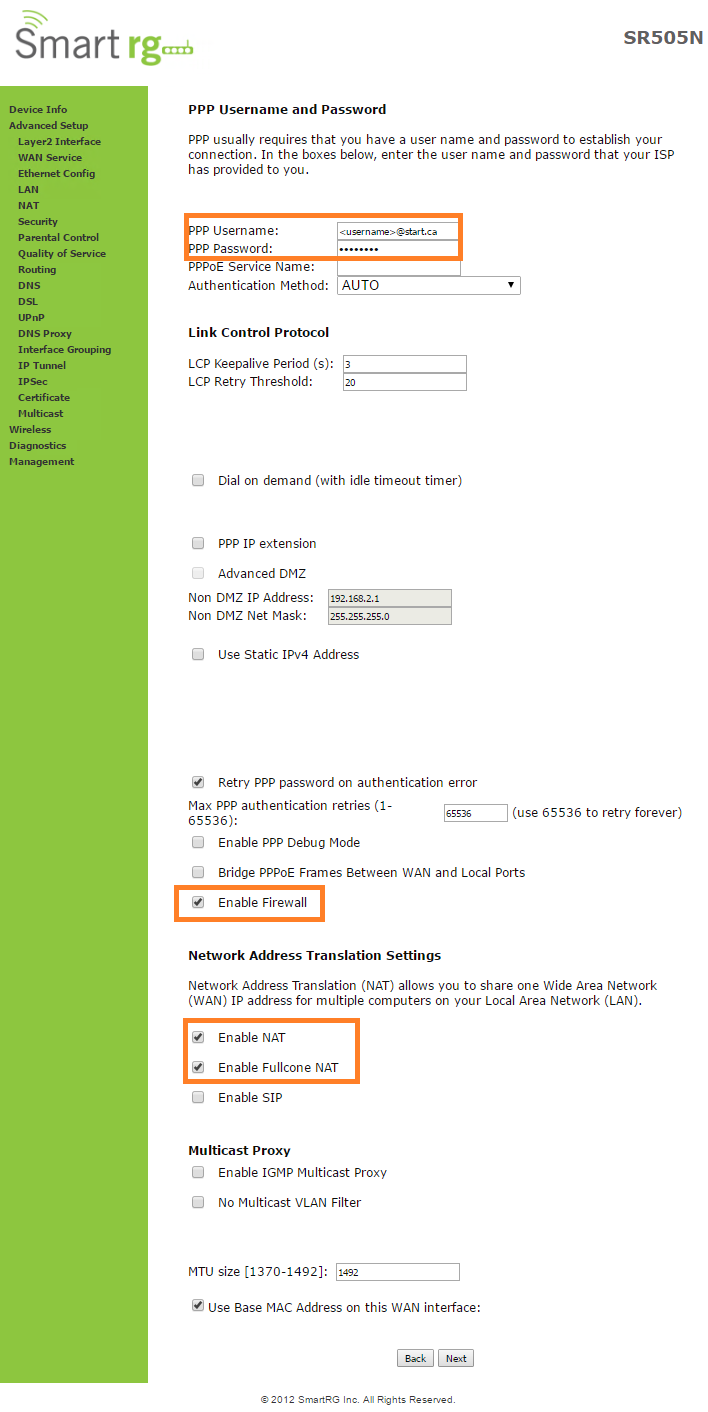
- Enter Username/ Password
- Enable Firewall
- Enable NAT
- Enable Fullcone NAT
Click Next on the next two pages
Then Apply/Save
Bridge Mode
How to Setup Bridge mode
- Make sure the Modem already has the newest firmware (See Firmware Upgrade)
- A ‘hybrid’ bridge mode can be achieved by adding a regular PPPoE setup and checking “Bridge PPPoE frames between WAN and local ports” in the WAN service.
- Bridge-only can be achieved by selecting “Bridging” as the WAN service.
- For VDSL make sure to change
- 802.1p Priority to 1
- 802.1q VLAN ID to 35
- For ADSL:
- Leave 802.1p Priority at -1
- Leave 802.1q VLAN ID at -1
- For VDSL make sure to change
VDSL PPPoE
How to remove and rebuild an VDSL PPPoE Connection
This should only be done if editing the existing connection doesn’t work
Go to Advanced Setup -> WAN Service
Remove all WAN Services
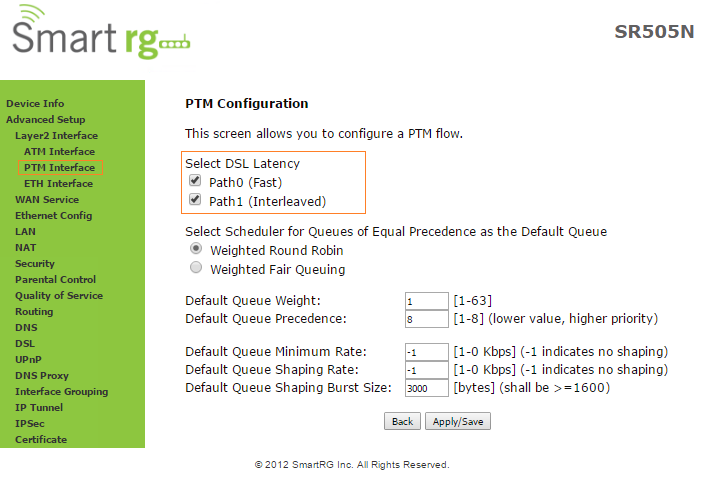
- Go to Layer 2 Interface
- Remove all ATM and PTM Interfaces
- Add a PTM Interface
- Select Path 0 and Path 1
- Apply/Save
- Go to WAN Service
- Add a WAN Service
- Click Next
- Select PPP Over Ethernet
- 802.1P Priority: 1
- 802.1Q VLAN ID: 35
- Network Protocol: IPv4
- Press Next

- Enter PPPoE Credentials
- Enable Firewall
- Enable NAT
- Enable Fullcone NAT
- Click Next
- Click Next on the next 2 pages
- Click Apply/Save
Watch for the Internet light to turn green.
Test browsing!
If this doesn’t work contact your ISP ask if they see your attempted authentication.
If they do then you might have an incorrect username/password.
If no, then a physical connection problem or configuration error.
Comments